
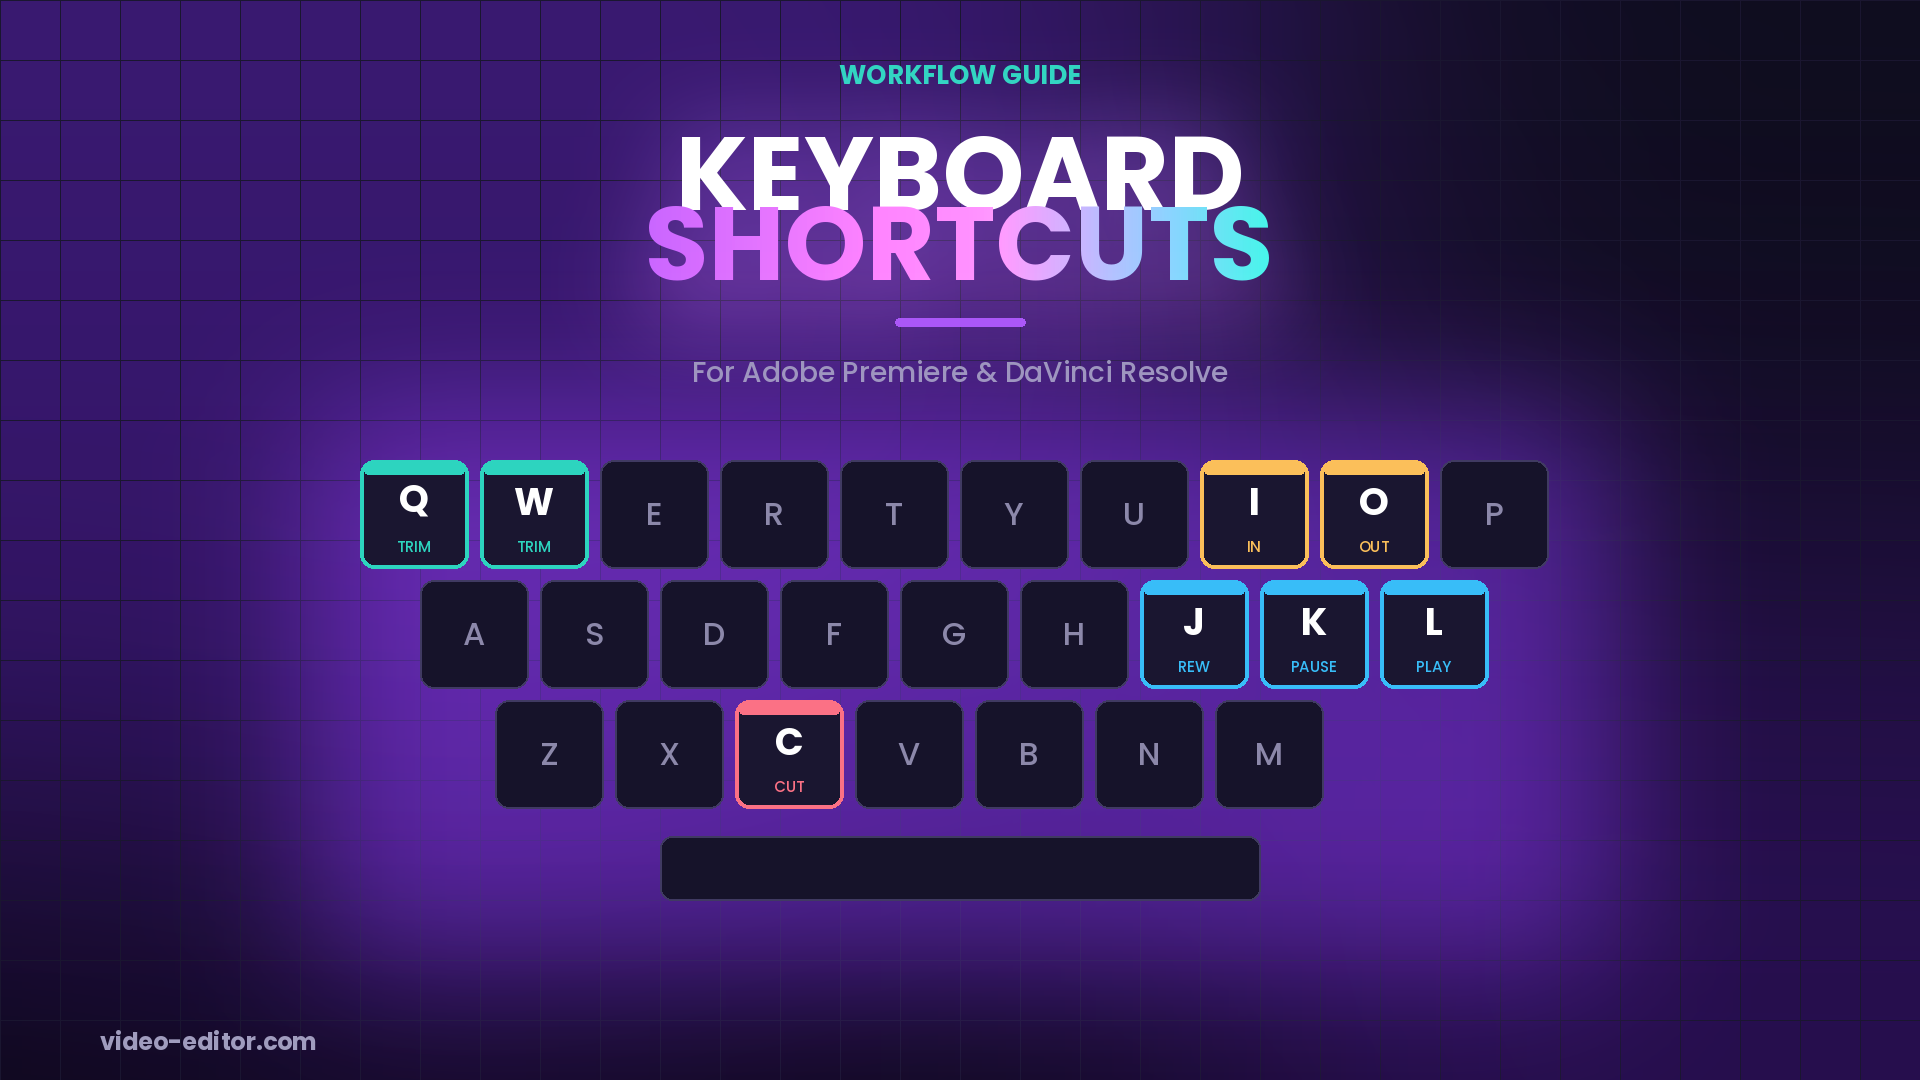
Every experienced editor eventually stops reaching for the mouse. Not because it looks impressive on a stream, but because every trip from keyboard to mouse and back costs a fraction of a second — and over an eight-hour edit session, those fractions add up to real time lost.
This guide covers what actually works: the shortcuts worth memorizing first, how to position your hands so they stay put, and how to build a custom keyboard setup instead of fighting the defaults.
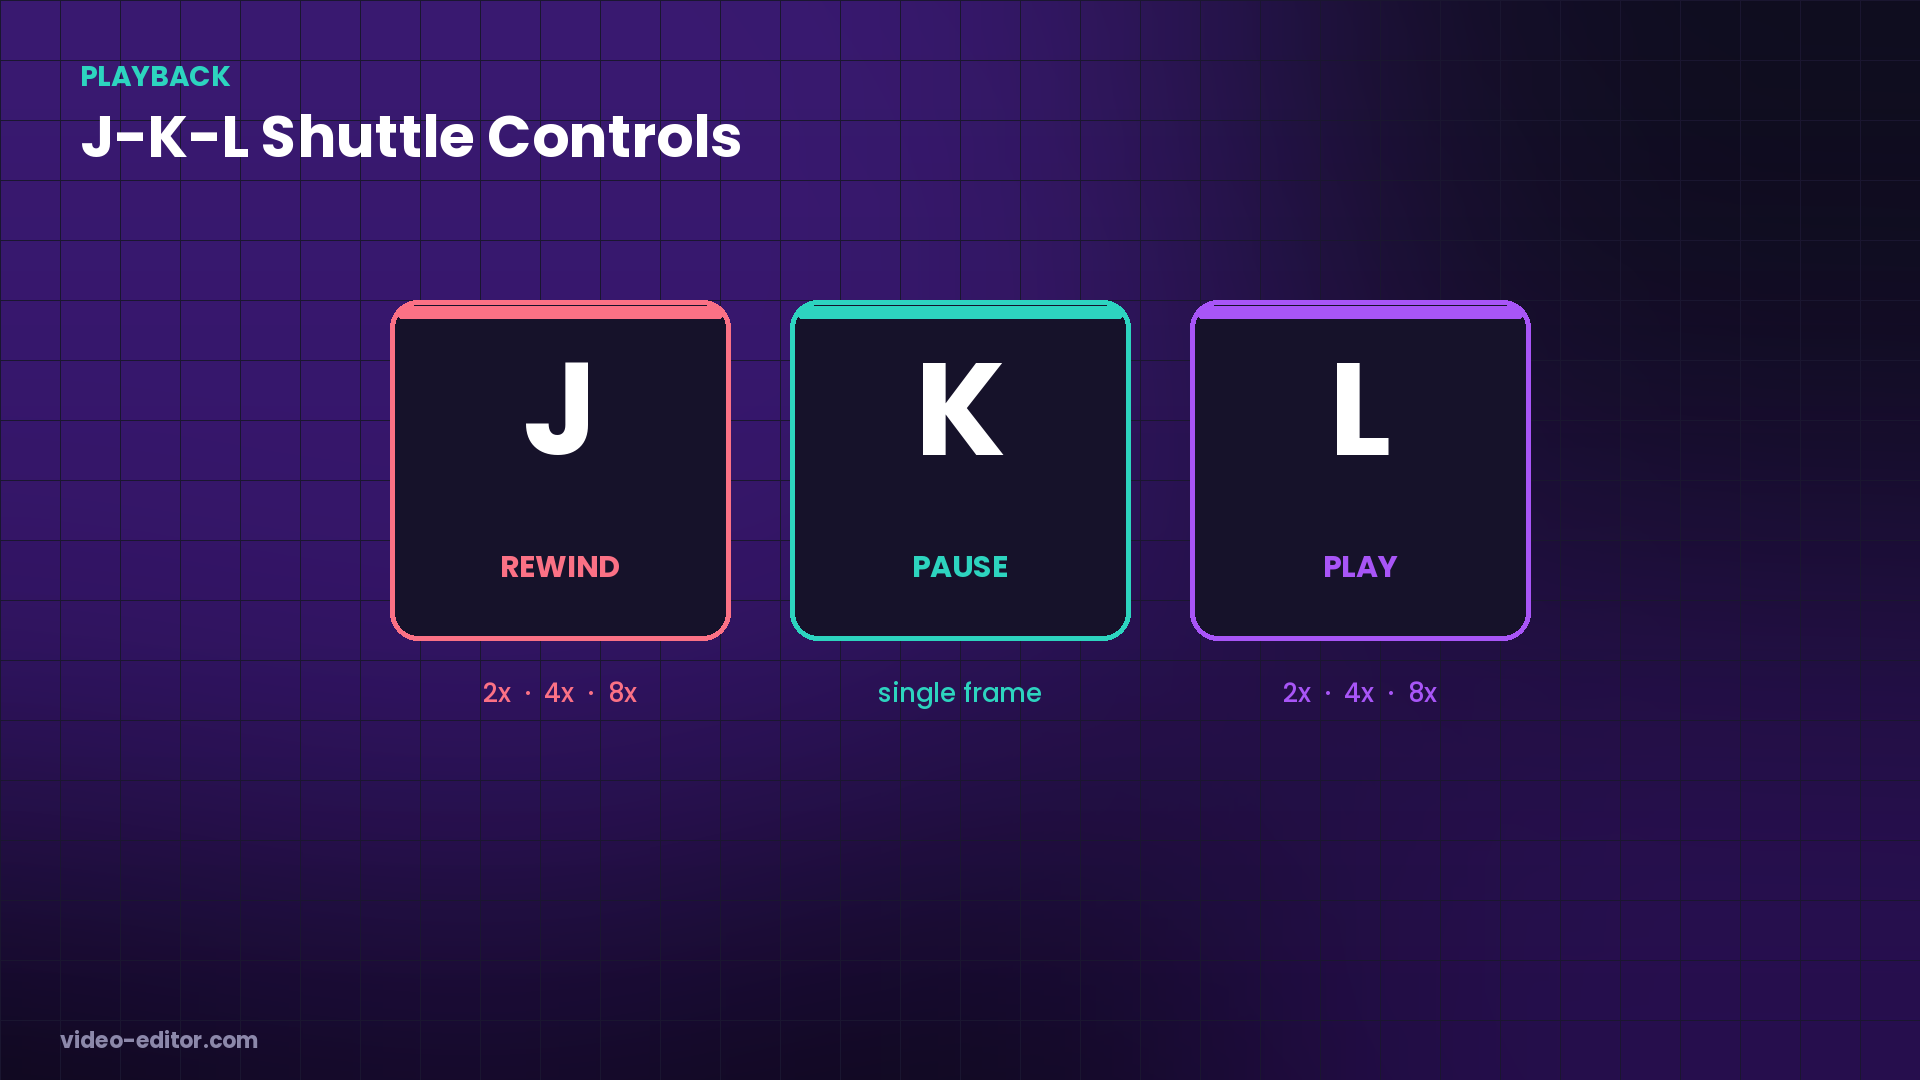
If you learn nothing else from this guide, learn this. J-K-L is the single most important shortcut pattern in editing, and it's the same across nearly every NLE.
This one pattern replaces the need to grab the mouse just to scrub through footage. Your right hand sits on J-K-L, your left hand stays near the modifier keys, and you never lose your place looking for a play button.
Most editors never think about this consciously, but it's the difference between a workflow that feels fast and one that feels like typing an essay. The goal is simple: your hands should stay in roughly the same spot for the majority of an editing session, with your fingers reaching only short distances for the commands you use constantly.
For a right-handed mouse user, the practical split looks like this:
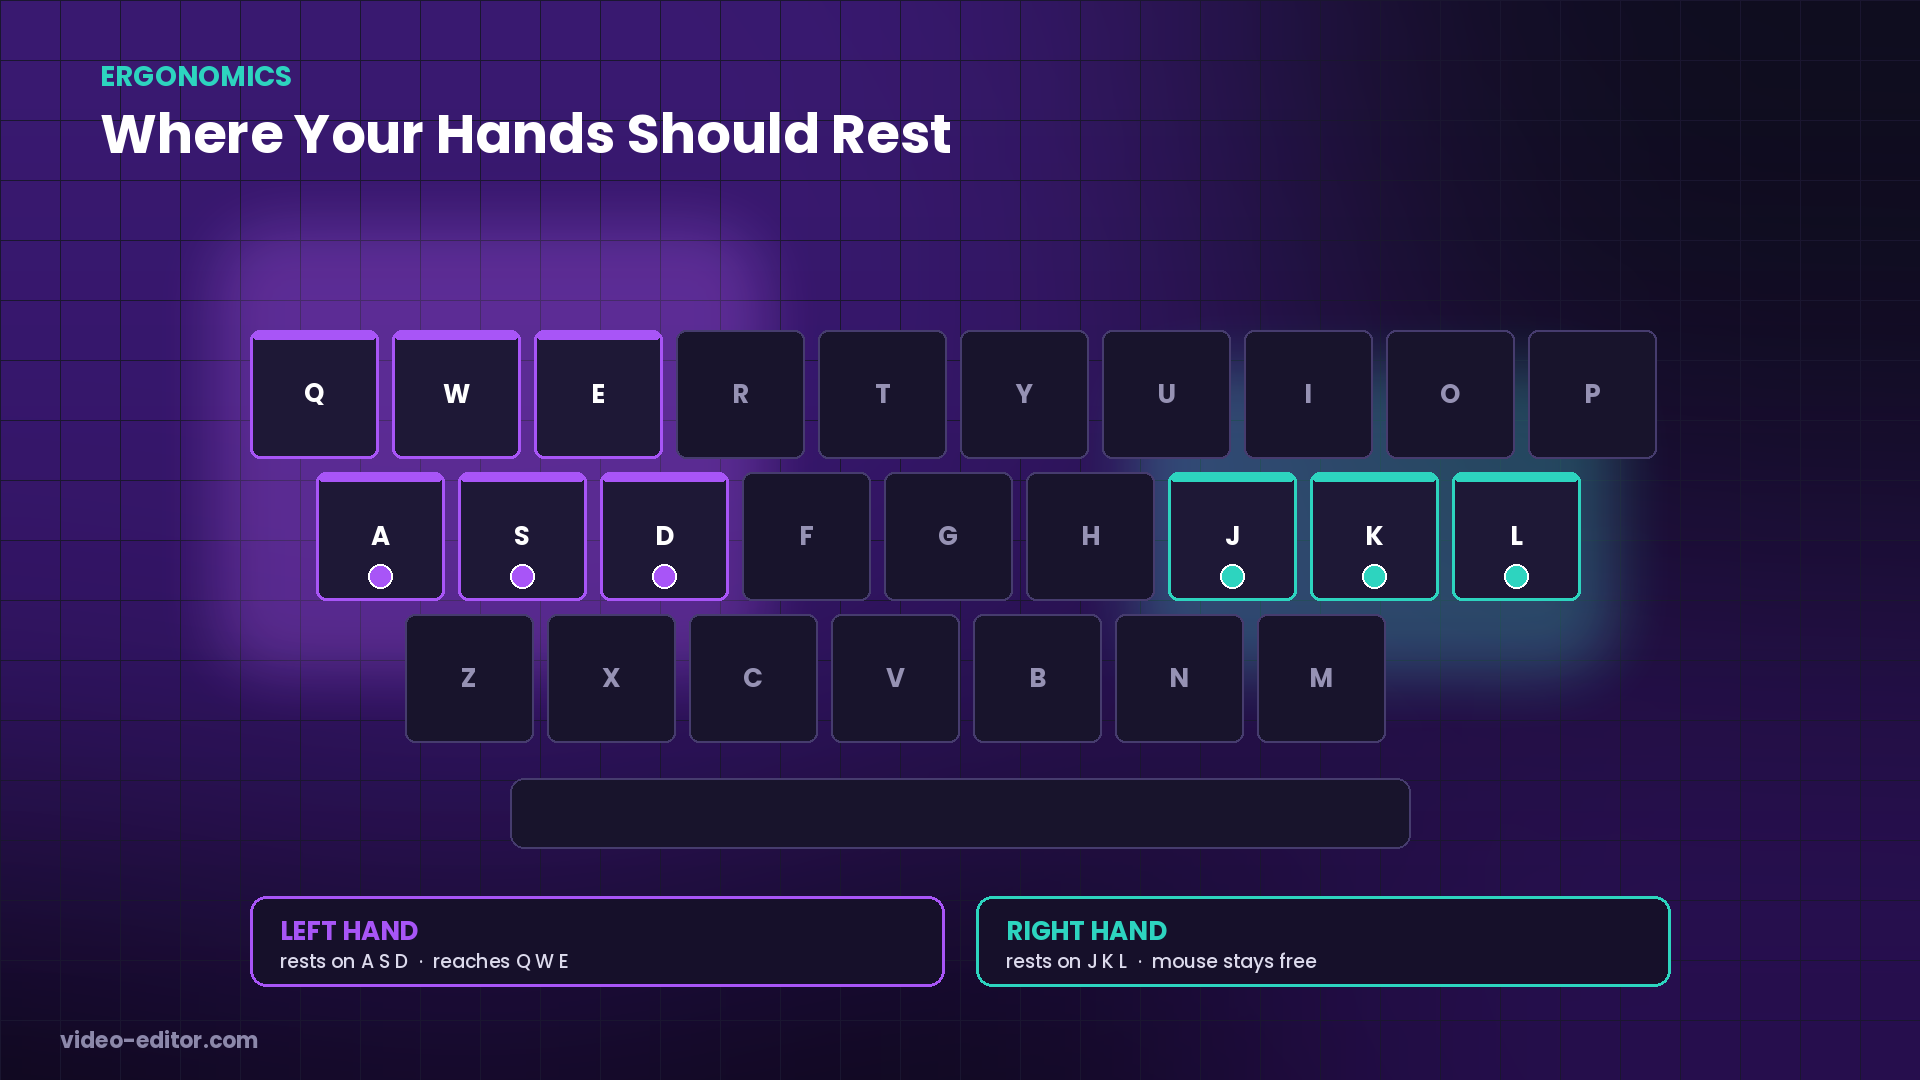
This isn't arbitrary. Q-W-E and A-S-D sit directly under your left-hand fingers in their natural resting position — no stretching, no looking down. That's exactly why so many editors remap their most common commands onto those keys instead of leaving them on whatever the default happens to be.
Every time your hand leaves its resting position to hunt for a key, you lose two things: the half-second of physical movement, and the mental break in flow while your eyes check the keyboard. On a short edit, that's negligible. Across a full day of cutting a multicam interview or a long-form video, it's the difference between finishing on time and finishing exhausted.
Don't try to learn fifty shortcuts at once — that's the most common reason people give up on this entirely. Start with the ones that touch nearly every cut you make.
| Action | Shortcut |
|---|---|
| Set In / Out point | I / O |
| Ripple Trim to playhead | Q / W |
| Razor / Cut clip | C |
| Ripple Delete | Shift + Delete |
| Add Edit at playhead | Ctrl/Cmd + K |
| Select track only (no linked audio) | Alt/Option + click |
| Zoom to fit sequence | \ (backslash) |
| Action | Shortcut |
|---|---|
| Set In / Out point | I / O |
| Blade edit (cut clip) | B, then click |
| Ripple Delete | Shift + Delete |
| Insert edit at playhead | F9 |
| Overwrite edit | F10 |
| Toggle snapping | N |
| Zoom to fit timeline | Shift + Z |
Learn these first, use them for a week on real projects, and let your hands find their own rhythm before adding anything else. Reaching for the mouse to do one of these is a signal — not a failure, just a reminder to slow down and use the key instead until it's automatic.
Default shortcuts are designed to avoid conflicts across every possible workflow — not to be fast for any one editor. Once J-K-L and the core commands are second nature, remapping the rest to fit how you personally work is where the real speed gain happens.
For a few days, pay attention to which commands you reach for through a menu instead of a key. Those are your remapping candidates — not some generic "best shortcuts" list, but the specific actions that slow you down in your specific workflow.
The mistake most editors make when customizing is picking keys based on what feels clever (first letter of the action, for example) instead of picking keys based on where your fingers already rest. A shortcut is only fast if your hand doesn't have to think about where to go.
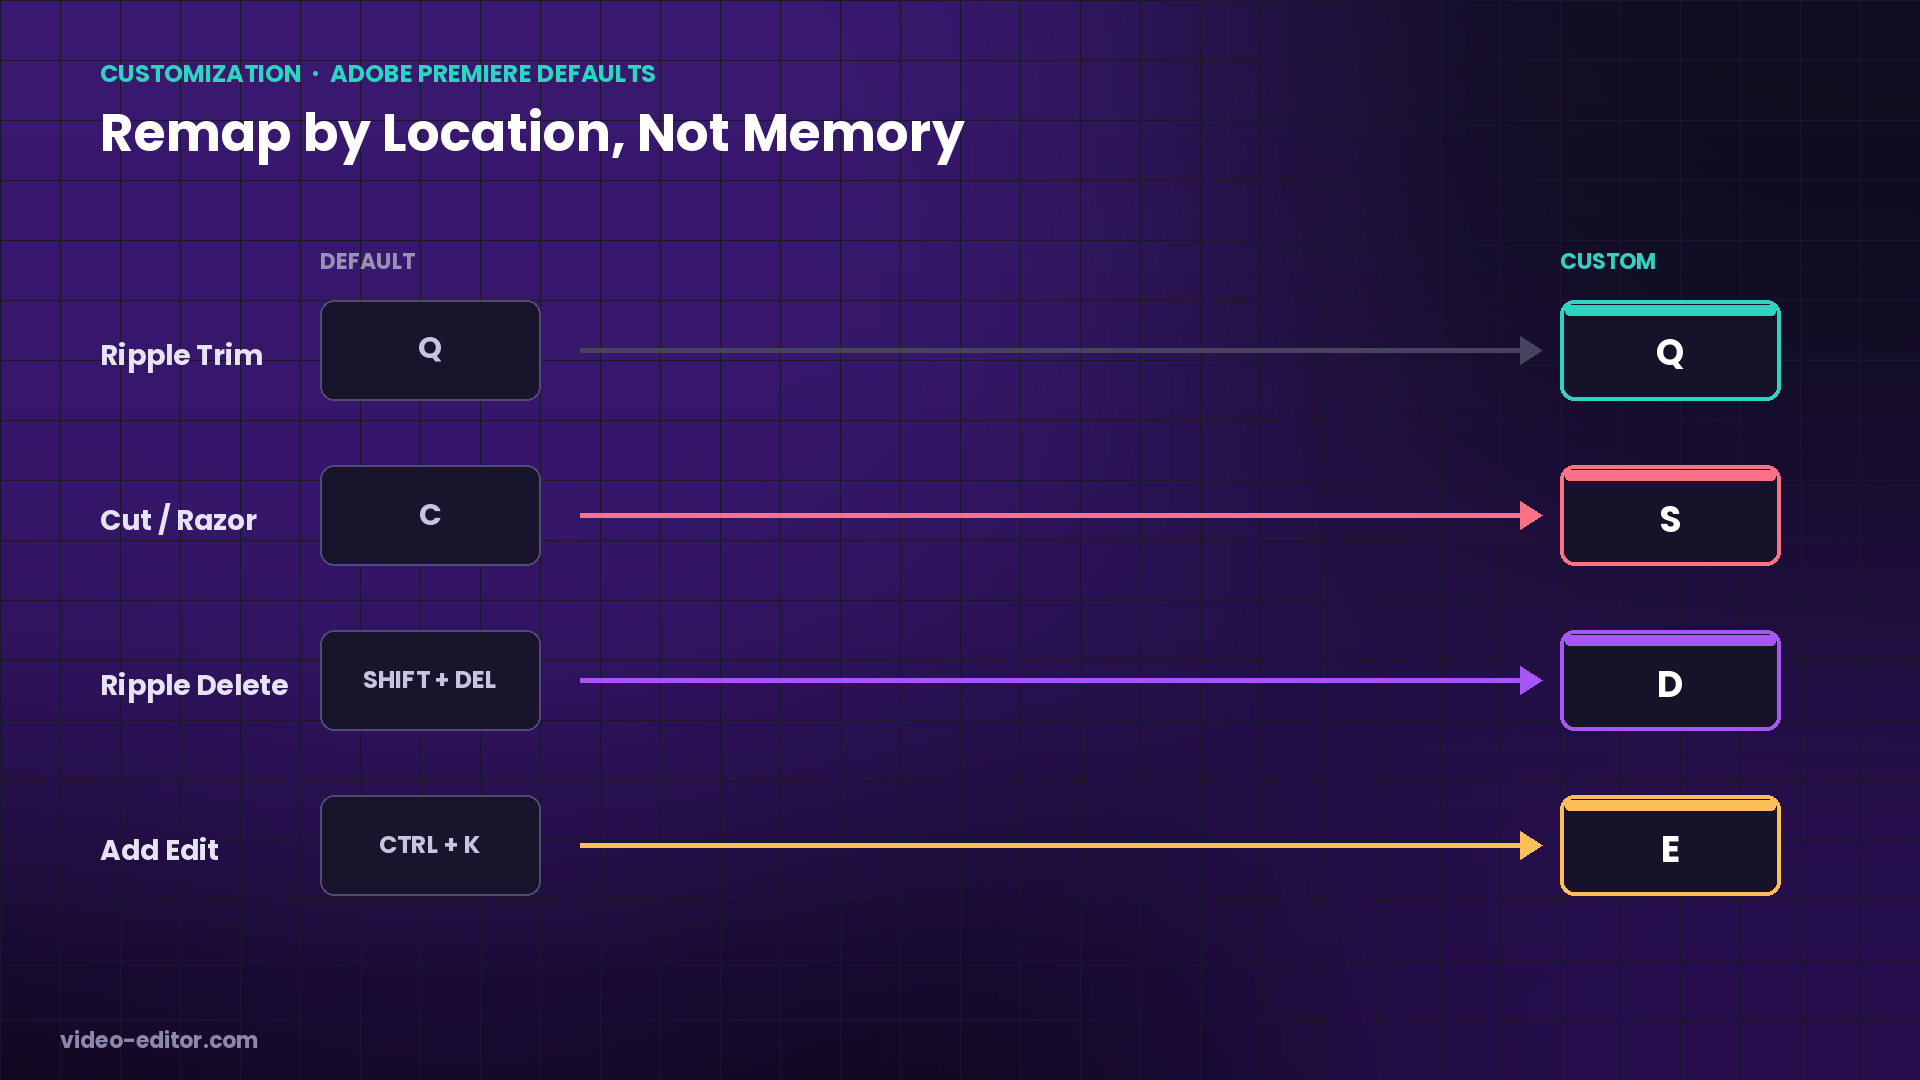
Premiere: Edit → Keyboard Shortcuts (Cmd/Ctrl + Alt + K)
DaVinci Resolve: DaVinci Resolve menu → Keyboard Customization
Both let you export your custom layout as a file. Do this once you're happy with your setup — it means your exact configuration travels with you to a new machine, a freelance gig, or after a software update resets defaults.
This is the setup most fast editors converge on eventually, whether they planned it or not: the left hand lives entirely on the keyboard, the right hand lives entirely on the mouse, and neither one crosses over.
The left hand handles everything that doesn't require visual precision — cutting, trimming, setting in/out points, toggling tools. The right hand handles the mouse for anything that needs a specific spot on the timeline or a specific frame in the monitor. Once this split is consistent, you stop losing time deciding which hand does what — it's automatic.
This is also why remapping onto Q-W-E-A-S-D specifically works so well: that entire block is reachable by the left hand without moving off its resting position, while the right hand stays free on the mouse the whole time.
For editors doing high-volume, repetitive work — vlogs, podcasts, templated social content — a macro pad or Stream Deck can genuinely help. The value isn't in having more buttons; it's in collapsing a multi-step action (add a lower third, apply a saved color preset, export with specific settings) into a single press.
Where it doesn't help: if your editing is varied and creative — narrative, documentary, commercial work where every project is different — a macro pad mostly sits idle. The time saved on repetitive actions doesn't materialize when few actions repeat. Know which category your work falls into before spending on hardware.
Dedicated editing keyboards and jog/shuttle controllers (built around the same J-K-L logic) are a similar story — genuinely useful for high-volume cutting and color work, unnecessary if you're not editing daily.
Adding fifteen new shortcuts in one session means none of them become automatic. Add two or three, use them exclusively for a week — force yourself to reach for the key even when the mouse feels faster in the moment — then add a few more.
Overwriting a key that already does something else is the single most common way custom shortcut setups fall apart. Check what a key does before reassigning it, especially if you're pulling shortcut ideas from someone else's setup — their conflicts may not match yours.
Software updates occasionally reset custom mappings, and switching machines means starting over — unless the layout was exported. This takes thirty seconds and saves hours of rebuilding a setup from memory.
This isn't a shortcut, but it belongs here: editing 4K or higher footage at full resolution makes every J-K-L scrub choppy, which defeats the purpose of a fast keyboard workflow. Dropping the program monitor to 1/2 or 1/4 resolution while cutting keeps playback smooth enough for the keyboard shortcuts to actually feel fast.
What's the single most important shortcut to learn first?
J-K-L for playback control. It replaces constant mouse trips to a play button and lets you scrub at multiple speeds without switching tools.
Should I use the default shortcuts or customize immediately?
Learn the defaults first. Customizing before you understand which commands you actually use often leads to a setup based on guesswork rather than real workflow patterns.
How many shortcuts should I try to learn at once?
Two or three at a time. Use them exclusively for several days until they're automatic, then add more. Trying to memorize a long list at once rarely sticks.
Are Premiere and DaVinci Resolve shortcuts similar?
The core logic is nearly identical — J-K-L for playback, I/O for in and out points, similar trim and ripple concepts — but exact key assignments differ. Editors who work in both regularly often customize one to match the other to avoid muscle-memory conflicts.
Is a macro pad or Stream Deck worth buying?
Only if your work is repetitive — templated content, high-volume social cuts, consistent export presets. For varied creative editing, a well-customized keyboard layout delivers most of the same speed without the extra hardware.
Why does my timeline feel choppy even with fast shortcuts?
Usually playback resolution, not the shortcuts themselves. Drop the program monitor to 1/2 or 1/4 resolution when editing high-resolution footage — full-quality playback isn't necessary until you're reviewing the final cut.
Want more practical guides for working video editors? Browse the full blog.
 u
u u
u